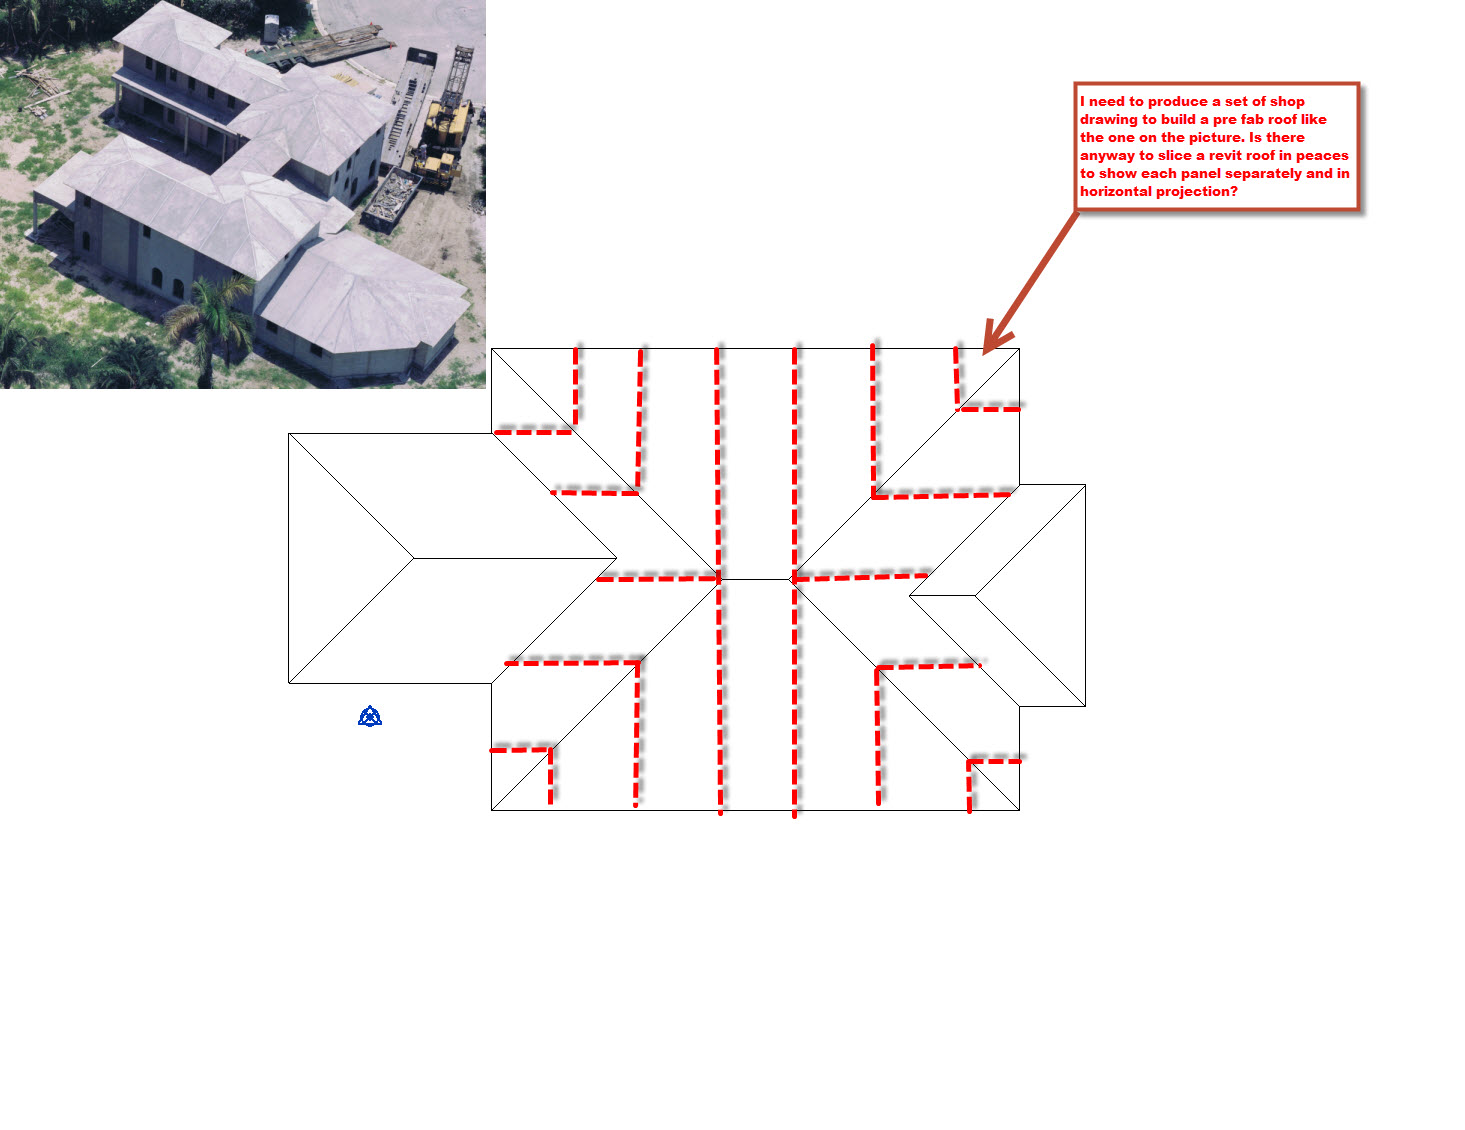
Slice Roof Revit
Split A Roof Or Structural Floor Revit Products 2018 Autodesk Knowledge Network

About Editing Floor And Roof Shape Revit Products 2019 Autodesk Knowledge Network
Solved Roof Spliced In Pieces Autodesk Community Revit Products

Cut Profile Youtube

Revit 07 13 Add Split Line Youtube

How Do I Get A 90 Degree Roof Edge On A Shed Roof Autodesk Community Revit Products

Open the revit family with unattached voids and click create tab properties panel family category and parameters.
Slice roof revit.

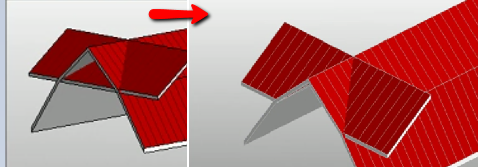
9 Tips To Understand Revit Roofs Revit Pure
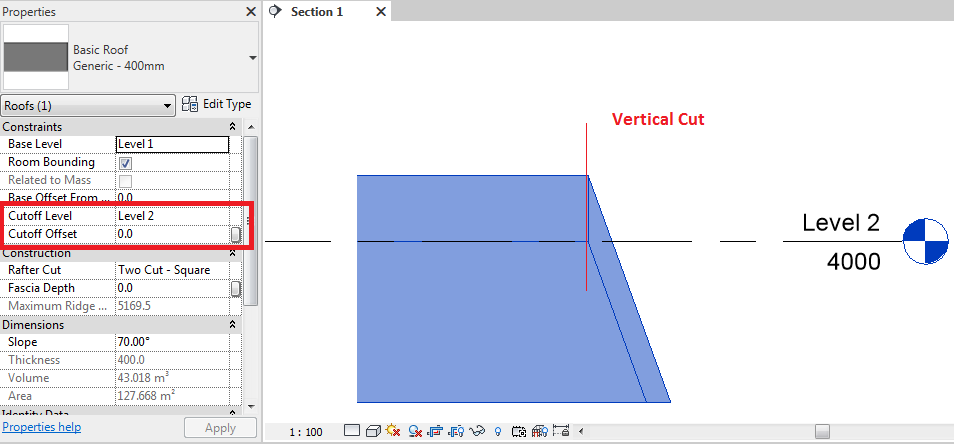
Cutoff Level Roof Behavior In Revit Revit Products 2018 Autodesk Knowledge Network
How To Cut A Hole To A Roof Revit Lt 2018 Autodesk Knowledge Network
21 Revit Keyboard Shortcuts Every Architect Should Know Architecture Design
Source : pinterest.com
